Professional Grout Restoration: What You Need to Know
What Professional Restoration Actually Looks Like
You've scheduled the estimate. Now what?
We understand that inviting a technician into your home can feel uncertain. What will they do? How long will it take? Will it be messy? Will they explain things or just start working?
This post is here to answer those questions. We're walking through every step of our professional restoration process, from the moment we arrive for an estimate to the final bead of caulk. No mystery. No surprises. Just the way we'd want to be treated in our own home.
Step 1: The In-Home Estimate
We're starting at the very beginning.
After initial contact, either via phone, email, or our website, we'll schedule an in-home estimate with one of our technicians. Our technician will be as prompt and courteous as possible, usually arriving within a half-hour grace period of the scheduled appointment time.
Upon greeting you, our technician will apply shoe covers or remove their shoes before entering. We want to leave your home in the exact state we entered in.
After being shown all areas with desired work, our technician will perform an inspection.
No clipboards for us—we've gone paperless. We're always trying to find newer, better ways to do everything. Our technician takes detailed notes and pictures, which are entered directly into our system on-site.
Once the inspection is complete, our technician will discuss any issues or concerns they noticed. If they don't discuss something with you, don't worry. It simply means they didn't find anything of major concern—or you may already be aware of the issue (you did call us, after all).
Estimates are sent electronically via email as soon as possible. You should receive yours within 48 hours. If you don't, please call or email us. And please check your spam folder.
If everything looks good, press the "approve estimate" button located within your emailed estimate. That notifies us you want to proceed, and we'll get in contact to schedule your project.
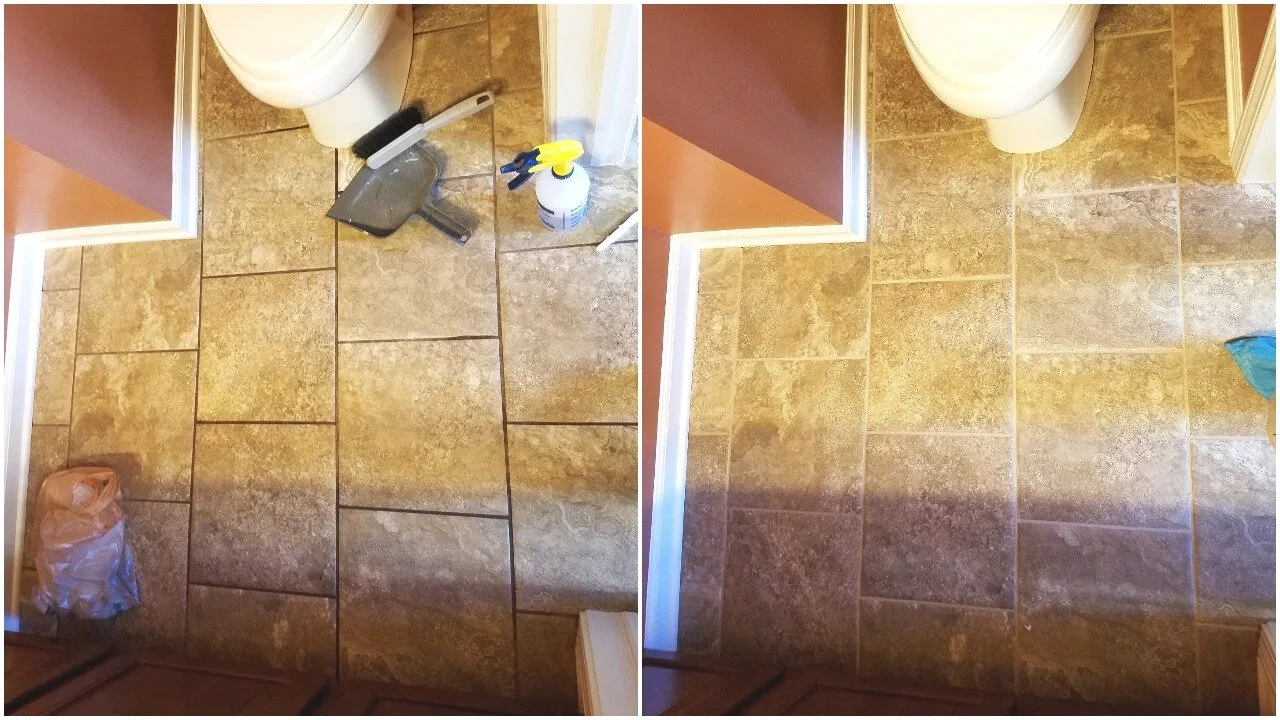
Step 2: Cleaning Your Tile & Grout
Once the project is scheduled, this is where the physical work begins.
What we do first: Our technician(s) begin by spraying a professional-grade cleaner on the project area. Depending on the size of the space, they may work in sections.
Why waiting is part of the process: Our cleaners require adequate dwell time to work properly. During this time, our technician(s) may do other required prep work. If none is required, don't be alarmed if you see them simply waiting around. They aren't wasting time—they're waiting for the cleaners to work their magic.
The agitation step: Once the cleaner has done its work, our technician(s) will agitate the grout lines with a grout brush. This is a necessary step to loosen embedded dirt, regardless of what equipment is being used.
The extraction step: Our technician(s) will then go over the area using either our large floor scrubbing machine or our handheld scrubbing machine (if a shower is being worked on). The cleaning agent is then removed by extraction. A neutralizing agent is then applied to the area, which is extracted shortly after as well, leaving your tiles squeaky clean.
What about tough buildup? In extreme cases, like heavy calcium buildup, hand tools may be necessary to remove the buildup. After removal, if the grout has been damaged or eroded away, we will replace it with as close a color match as possible.
Important note on tile types: Different tiles require different methods and cleaners. For example, we never use acids on natural stone, and especially not on marble. Our technicians are trained to identify your tile type and use the appropriate products.
Step 3: Sealing Your Grout
This is where professional restoration differs most from anything you can buy at a hardware store.
Prep work is essential: Unless you have a brand new installation, we have to prep your grout before sealing. Our cleaners are specially designed to open the pores in your grout—and this must be done prior to any sealant application. This is why the cleaning step above is so important.
Our sealant of choice: On most applications, our technician(s) will use our Dual-Polymer Titanium Epoxy Sealant. This is a commercial-grade product that outperforms anything available to consumers.
The application process: Wearing gloves for protection and using a nylon-polyester brush, our technician(s) meticulously apply the sealant to the grout—ensuring the entire joint is covered, being careful not to get any epoxy on the tile itself. Epoxy has a very strong smell and we do recommend opening windows and turning on exhaust fans during this phase.
IF YOU FIND ANY EPOXY ON YOUR TILES
It can be removed with a flat single-edge razor blade. We’re careful, but if you spot something after we leave, now you know.
How long it takes: This is often the longest part of a standard project. However, once complete, your grout will be protected better than ever.
Drying times you can count on:
Floors can be used as normal after roughly 6 hours
Showers and areas subject to heavy water exposure can be used as normal 48 hours after completion
Step 4: Sealing Your Tile
Not all tile needs to be sealed. Here's what you should know.
Ceramic vs. natural stone: Typically, only natural stone needs to be sealed. Ceramic tiles have a factory-applied coat that should last the lifetime of the tile.
The prep work: Thoroughly cleaning the area and removing loose debris and contaminants is a must. Our technician(s) will first identify if the tile already has a sealant applied. If old sealant remains, it must be removed before starting to ensure proper bonding.
The application: Using a lambswool applicator (to ensure consistent application), our technician(s) apply small amounts of sealant—either gloss or matte finish depending on your desired results—to the area, working backward as to not step on the wet sealant.
The finish: They wait the required time, then apply additional coats as needed. Our technicians will ensure a smooth and even finish.
Step 5: Replacing Caulk (The Step Others Most Often Skipped)
This step matters more than most homeowners realize.
What caulk actually does: Caulk is the last piece of any good project. Used to fill gaps—typically at a change of plane—caulk really brings the project together. A bad caulk line can make your entire bathtub look bad.
But caulk isn't just cosmetic. It also protects the wall behind and the floor beneath from water exposure and eventual damage. Missing or damaged caulk can lead to a very expensive repair if water has damaged the walls behind.
What we use: Restoration Tile and Grout uses a siliconized acrylic caulk in most projects. We also offer an epoxy caulk replacement for customers who want maximum durability.
How we do it differently: Many other contractors skip the most important step—they caulk directly over existing caulk.
We don't. Restoration Tile and Grout begins by removing the old caulk completely and thoroughly cleaning the gap before applying a beautiful new bead of caulking. This ensures consistency in caulk application and prevents bleed-through of any stains or mold on the old caulk.
Our recommendation: To keep your showers and tubs in top shape, it's highly recommended to inspect caulk annually.